Berry Cream Popsicles

June is National Dairy Month and this week some foodie friends and I will be sharing lots of recipes to celebrate. I'm kicking things off with one of my favorite cool treats, popsicles!


I found Cindy R's recipe for Blueberry Cream Pops on the Taste of Home website.  Since it's strawberry season here I decided to add those as well. I have simple syrup in the fridge because I use it in my cold brew coffee, but if you don't you need to plan time to make it and let it cool. 

I added the chopped berries, simple syrup and heavy cream to a glass measuring cup because I knew it would be easier to pour into the molds that way.

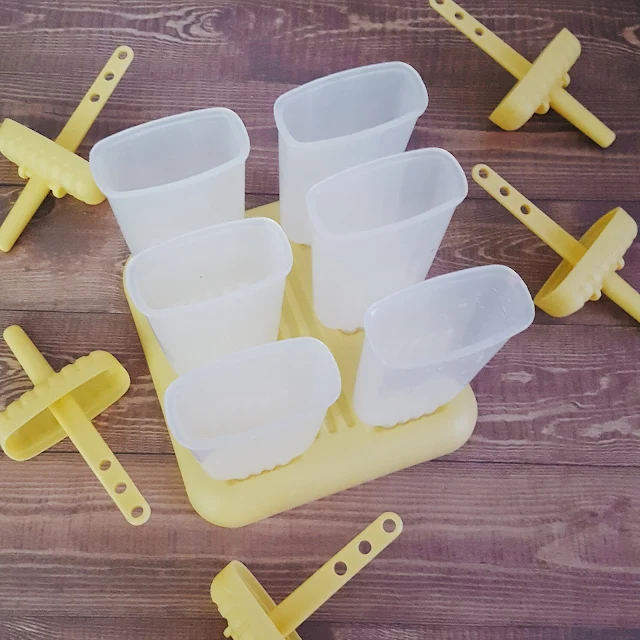
I've got 3 sets of these molds, I just love them.  If you don't have molds you can definitely go old school and use cups and popsicle sticks.

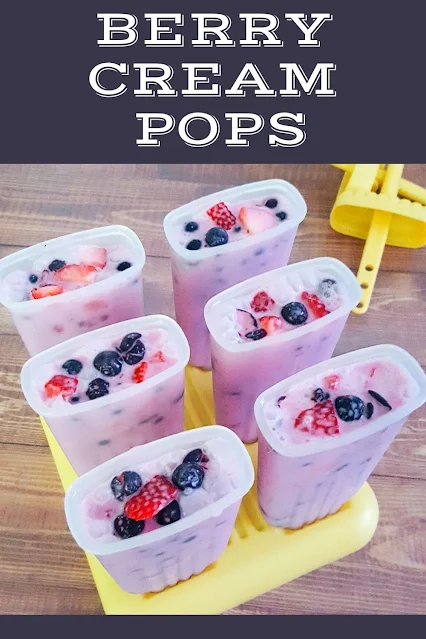
You want to fill them right up to the top and I tossed in a few more berries for good measure.  Pop the handles in and then freeze.  We were in and out of the freezer a lot that day, so I let mine go overnight.

To unmold the pops I run them under some barely warm water.  If it doesn't slide out I do it again.  You don't want to force them out of the molds because the handle will come lose and the pop will stay inside the base.

These really hit the spot on those hot summer days!  I can't wait to try them again later in the season with some of our blackberries! Be sure to go and check out the other bloggers recipes by clicking the link down below and come back on Wednesday and Friday for more National #DairyMonth recipes!

Berry Cream Popsicles

Berry Cream Popsicles
Author: Jolene's Recipe Journal

Ingredients

  • 2/3 cup sugar
  • 2/3 cup water
  • 2 cups fresh or frozen blueberries, thawed
  • 1/4 cup heavy whipping cream
  • 8 freezer pop molds or 8 paper cups (3 ounces each) and wooden pop sticks

Instructions

  1. For sugar syrup, in a small saucepan, combine sugar and water; bring to a boil, stirring to dissolve sugar. Cool completely.
  2. Meanwhile, in a bowl, coarsely mash blueberries; stir in cream and sugar syrup.
  3. Spoon into molds or paper cups. Top molds with holders. If using cups, top with foil and insert sticks through foil. Freeze until firm.
  4. To serve, let pops stand at room temperature 10 minutes before unmolding or run them under warm water.
berries, popsicle, cream
Dessert, Cool treats, kid friendly
American


Monday #DairyMonth Recipes

  • Asiago Cheese Bagels by Karen's Kitchen Stories
  • Berry Cream Pops by Jolene's Recipe Journal
  • Broccoli Cheese Casserole by Art of Natural Living
  • Gochujang Paneer Bowl by Magical Ingredients
  • Lemon-Blueberry Cheesecake Shake by A Little Fish in the Kitchen
  • Macaroni Salad Caprese by Palatable Pastime
  • Milk Cookies by A Day in the Life on the Farm
  • No Churn Blueberry Ice Cream by Hezzi-D's Books and Cooks
  • One Pot Garlic Parmesan Chicken Pasta by Hostess At Heart
  • Pimento Cheese Mac and Cheese by A Kitchen Hoor's Adventures
  • Reese Peanut Butter Cup Ice Cream by Blogghetti
  • Slow Cooker Cream Cheese Chili Chicken by Cheese Curd In Paradise
  • S’mores Ice Cream by Jen Around the World
  • Vanilla Bean-Nutmeg Milkshake with Blackberry Swirl by The Spiffy Cookie
  • ***********


    Comments

    1. A delicious way to give your family a treat that you know is healthier for them than store bought.

      ReplyDelete
      Replies
      1. How fun! Whatever happened to yummy stuff we make at home?

        😁

        Delete
    2. These look amazing. I happen to have that popsicle mold and I will be making these.

      ReplyDelete
    3. What a delicious berry ice pop.

      ReplyDelete
    4. Those popsicles look so creamy and delicious!

      ReplyDelete
    5. THese look so yummy and healthy! Making LOTS of popsicles is a big summer goal for me.

      ReplyDelete
    6. I can't wait to make these. I will be living off of them this summer!

      ReplyDelete
    7. Berries are my favorite. Using the fresh berries and making a popsicle is the best idea for this season. The temperature is hitting 3 digits and I would love to have a few of these popsicles!

      ReplyDelete
    8. I been wanting to buy some mold for homemade popsicles, this will be the first recipe I try! They look so creamy and good!!

      ReplyDelete
    9. I been wanting to buy some mold for homemade popsicles, this will be the first recipe I try! They look so creamy and good!!

      ReplyDelete
    10. Replies
      1. Excellent recipe, Cindy! So glad you shared it!

        Delete
    11. My kids will be all over these berry pops! Perfect for summer.

      ReplyDelete
    12. I LOVE popsicles! I haven't made any in a while. I'll have to pop these in the freezer soon!

      ReplyDelete

    Post a Comment

    Popular posts from this blog

    Copycat Dunkin Donuts Egg White & Veggie Omelet Bites

    I'm a huge fan of the Dunkin Donuts Power Breakfast sandwich, so when I started seeing ads for the new Egg White & Veggie Omelet Bites I stopped in and gave them a try.  They were delicious, but of course, I knew I could make them at home.  I started with the whites of six eggs. You can use pasturized whites if you don't want to do the whole separating, finding a use for the yolks thing.  I beat them up with some salt and pepper.   Next up, the tomato and spinach.  I used grape tomatoes, seeded them and then chopped them into 1/4" pieces. I like baby spinach, and I took about 10 leaves and chopped those up into 1/4" pieces as well. I added that to the egg mixture.  When you pour it into the pans, be sure that it all gets evenly distributed. They bake up pretty quickly, around 9 minutes or so.  Dunkin gives you two egg bites, the mini donut serving size is three. I pop them in ziplocs in the fridge and just pull a bag and reheat them in the microwave for a quick

    Copycat Dunkin Donuts Bacon and Cheddar Omelet Bites

    Since I already came up with a version of Dunkin Donuts new Egg White & Veggie Omelet Bites for myself, I decided to make the other variety that they are offering, Bacon & Cheddar, for my husband. Super simple.  Beat up some eggs with salt and pepper.  Add in some shredded cheddar and a slice of bacon cut into 1/4" pieces (I used kitchen shears).  Bake them for about 9 minutes in sprayed mini donut pans. They baked up light and fluffy.  The bacon stayed crisp and there's just the perfect amount of cheese.   I split them up into portions in zip top bags and that way we can just grab a bag and warm them up. My husband laughed when I told him 3 is the serving size.  I'll definitely be doubling the recipe next time! Copycat Dunkin Donuts Bacon & Cheddar Omelette Bites Print With Image Without Image Author: Jolene's Recipe Journal Ingredients 4 large eggs 1/4 teaspoon salt 1/2 teaspoon pepper 3T shredded cheddar cheese 1 slice cooked bacon, cut in 1/4" piec

    Stuffed Waffles

    I wasn't sure I was going to blog these stuffed waffles since it was the first time I tried using the new iron but since I'd already taken the pics as I went I figured, why not? They aren't perfect but they are delicious! I'd seen videos floating around TikTok and Instagram of people making stuffed waffles so I hopped over to Amazon and ordered the Elite Gourmet version.  The instructions were fairly straightforward but there was no recipe so I made up a batch of Classic Waffle batter. Then I scoured the fridge for things to stuff them with.    First up, some leftover taco meat from the previous night and Fiesta blend cheese,  pepperoni and mozzarella cheese and lastly some strawberries and cream cheese.   For the taco stuffed I added the taco meat and cheese in the middle and then set out some salsa and sour cream to top them with.  Learning curve lesson 1- make sure your ingredients are all room temp before you start, they will bake much quicker.  For the pepperoni pi