Chocolate Week continues and today I'm sharing Chocolate Cinnamon Rolls. I found Rita L's recipe on the Taste of Home website and it's helped me to make another step forward in conquering my fear of yeast baking. I made no changes to the recipe but I can share a few tips in the actual process that I used.
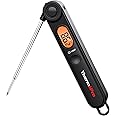
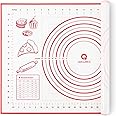
I made sure my water was the right temp (110º to 115º) by testing it with an instant read thermometer. I rolled out dough on top of a pastry mat, the measured markings make it simple to know you've reached the right size and also to cut into 12 equal pieces.
Since the dough is dark, I tested mine with a instant read thermometer to make sure they were done (about 195 degrees). I iced mine in the pan and rather than doing all the rolls in long ribbons, I did each one individually.
It looks a little heavy handed but the ratio of roll to icing was perfect for us. I sprinkled the tops with some mini chocolate chips. Chocolate shavings would be good as well if you wanted a more "fancy" look.You can see where the butter/cinnamon sugar swirls were. I'd probably double that mixture next time because it kind of disappeared into the roll itself.
I hope that you are enjoying #ChocolateWeek as much as I am. Be sure to go and see what the other bloggers are serving up using the links down below and thanks again to Christie from A Kitchen Hoor's Adventures for hosting!
Chocolate Cinnamon Rolls

Ingredients
- 1 package (1/4 ounce) active dry yeast
- 3/4 cup warm water (110° to 115°)
- 1/4 cup shortening
- 1 teaspoon salt
- 1/4 cup plus 3 tablespoons sugar, divided
- 1 large egg, room temperature
- 1/3 cup baking cocoa
- 2-1/4 cups all-purpose flour
- 1 tablespoon butter, softened
- 1-1/2 teaspoons ground cinnamon
- 1 cup confectioners' sugar
- 1/2 teaspoon vanilla extract
- 1-1/2 tablespoons whole milk
- Mini chocolate chips or chocolate shavings, if desired
Instructions
- In a large bowl, dissolve yeast in warm water; let stand for 5 minutes. Add shortening, salt, 1/4 cup sugar, egg, cocoa and 1 cup flour; beat for 2 minutes.
- Stir in remaining flour and blend with a spoon until smooth. Cover and let rise in a warm place until doubled, about 1 hour. Stir dough down and turn onto a well-floured surface (dough will be soft).
- Roll out into a 12x9-in. rectangle. Carefully spread with butter. Combine cinnamon and remaining sugar; sprinkle over butter. Roll up gently, beginning at a wide end.
- Cut into 12 pieces and place in a greased 9-in. square baking pan. Cover and let rise in a warm place until doubled, about 45 minutes. Bake at 375° for 25 minutes.
- Meanwhile, for icing, stir all ingredients together in a small bowl until mixture is desired spreading consistency. Drizzle icing onto warm rolls. Sprinkle with mini chips, if desired.
Notes
Source: Taste of Home, recipe is no longer available on the website
More Chocolate Recipes
- Cake in a Jar from Devour Dinner
- Chocolate Cake Mix Donuts from Blogghetti
- Chocolate Chip Brownies from That Recipe
- Chocolate Chip Pecan Shortbread Cookies from Shockingly Delicious
- Chocolate Cinnamon Rolls from Jolene's Recipe Journal
- Chocolate Funnel Cakes from Cindy's Recipes and Writings
- Chocolate Pomegranate Crostini from A Day in the Life on the Farm
- Ferrero Rocher Ice Cream from The Fresh Cooky
- No Bake S'mores Pudding Pie from Hezzi-D's Books and Cooks
- Peanut Butter Cup Brownies from Karen's Kitchen Stories
- White Chocolate Mousse with Raspberries from The Redhead Baker
- White Chocolate Strawberry Bombs from Magical Ingredients
- White Chocolate Strawberry Muddy Buddies from An Affair from the Heart


I love the idea of these cinnamon rolls. Chocolate and cinnamon go so well together.
ReplyDeleteThey turned out beautifully. Love the sprinkle of mini chip on top. Great touch.
ReplyDeleteI love this idea and the rolls turned out gorgeous!
ReplyDeleteI never would have thought of this. You are brilliant and these are gorgeous.
ReplyDeleteCHOCOLATE!! Just when I thought I loved cinnamon rolls before.... YUM!
ReplyDeleteWhat a great chocolate twist on cinnamon rolls!
ReplyDeleteI am making these this weekend! And while I think they look perfect, I would double the filling too, because double filling! :-)
ReplyDeleteDelicious idea! This will be a divine breakfast! YUM!
ReplyDeleteAny excuse I can to have chocolate for breakfast is a good one for me! These look super scrumptious.
ReplyDelete