Hydrangea Cupcakes


When I was a kid, my mom would keep me out of her hair by making up a batch of icing and sitting me down with some decorating practice sheets. She was an amazing decorator, the one that everyone came to for cakes for their special occasion.


Disclaimer:  I received product from Nielsen-Massey to use in creation of this post.  This post contains Amazon Affiliate links.  I earn a small commission at no cost to you with the purchase of the product. All opinions are my own.
 
This month's Nielsen Massey's #BetterYourBake tip is decorating with  Buttercream Flowers and features how to pipe roses and hydrangeas. For the flowers I used vanilla buttercream. It comes together so easily, and I colored 2/3rds blue and 1/3rd yellow.


I used a 2D decorating tip in a disposable pastry bag. My tip to you is to twist the bottom of the pastry bag above the tip and put a small clip there so icing doesn't squeeze out of the bottom while you're filling the bag.

I carefully spread the blue around the outside of the bag like in the video, and then put the yellow in the center. I did a few test flowers on some parchment, it took 4 or 5 before the color mix was right. Then I moved onto the cupcakes. It's like magic, watching the little blossoms appear!


Other posts featuring Nielsen Massey #BetterYourBake tips that you may enjoy:
Honey Vanilla Pancakes (Tip #1: How to separate eggs & whisk)
Brown Butter Chocolate Snickerdoodles (Tip #2: How to brown butter)
Mini Chocolate Eclairs with Vanilla Pastry Cream (Tip #4: How to fill a pastry bag)
Lemony Madeleines (Tip #5: How to prep & use a baking mold)

Hydrangea Cupcakes

Hydrangea Cupcakes
Author: Jolene's Recipe Journal

Ingredients

  • 24 cupcakes
  • For the frosting
  • 3/4 cup unsalted butter, softened
  • 3 1/2 cups powdered sugar
  • Pinch of salt
  • 2 1/2 tablespoons milk
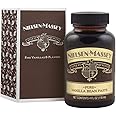
  • 1 tablespoon Nielsen Massey Pure Vanilla Bean Paste
  • Food gel colors, I used blue and yellow

Instructions

  1. In your stand mixer using the whisk attachment, beat butter until smooth. Add in powdered sugar and salt. Whisk on low speed until combined, scrape down sides of bowl if necessary. Add milk and vanilla. Beat on high for 2 to 3 minutes or until light and fluffy. Add more milk or powdered sugar to reach desired consistency.
  2. Divide into two bowls, with 2/3rds in one bowl and the remaining 1/3 in the other. Tint the larger amount blue, and the smaller amount yellow.
  3. Prepare pastry bag. Drop in tip and secure with coupler. Fold the top of the bag down and spread the blue frosting onto the sides with a small spatula, covering it evenly. Place yellow frosting in the center.
  4. Roll top of bag back up and closed, then push the icing down slightly. Twist the bag closed and test pipe a few flowers onto parchment or a baking sheet. When the desired look is achieved, pipe flowers onto cupcakes, starting around the outer edge and working toward the center.
  5. Repeat with remaining cupcakes. Store cupcakes in the refrigerator until serving.
cupcakes, buttercream,
Dessert, Mother's Day
American


Comments

Popular posts from this blog

Copycat Dunkin Donuts Egg White & Veggie Omelet Bites

I'm a huge fan of the Dunkin Donuts Power Breakfast sandwich, so when I started seeing ads for the new Egg White & Veggie Omelet Bites I stopped in and gave them a try.  They were delicious, but of course, I knew I could make them at home.  I started with the whites of six eggs. You can use pasturized whites if you don't want to do the whole separating, finding a use for the yolks thing.  I beat them up with some salt and pepper.   Next up, the tomato and spinach.  I used grape tomatoes, seeded them and then chopped them into 1/4" pieces. I like baby spinach, and I took about 10 leaves and chopped those up into 1/4" pieces as well. I added that to the egg mixture.  When you pour it into the pans, be sure that it all gets evenly distributed. They bake up pretty quickly, around 9 minutes or so.  Dunkin gives you two egg bites, the mini donut serving size is three. I pop them in ziplocs in the fridge and just pull a bag and reheat them in the microwave for a quick

Copycat Dunkin Donuts Bacon and Cheddar Omelet Bites

Since I already came up with a version of Dunkin Donuts new Egg White & Veggie Omelet Bites for myself, I decided to make the other variety that they are offering, Bacon & Cheddar, for my husband. Super simple.  Beat up some eggs with salt and pepper.  Add in some shredded cheddar and a slice of bacon cut into 1/4" pieces (I used kitchen shears).  Bake them for about 9 minutes in sprayed mini donut pans. They baked up light and fluffy.  The bacon stayed crisp and there's just the perfect amount of cheese.   I split them up into portions in zip top bags and that way we can just grab a bag and warm them up. My husband laughed when I told him 3 is the serving size.  I'll definitely be doubling the recipe next time! Copycat Dunkin Donuts Bacon & Cheddar Omelette Bites Print With Image Without Image Author: Jolene's Recipe Journal Ingredients 4 large eggs 1/4 teaspoon salt 1/2 teaspoon pepper 3T shredded cheddar cheese 1 slice cooked bacon, cut in 1/4" piec

Stuffed Waffles

I wasn't sure I was going to blog these stuffed waffles since it was the first time I tried using the new iron but since I'd already taken the pics as I went I figured, why not? They aren't perfect but they are delicious! I'd seen videos floating around TikTok and Instagram of people making stuffed waffles so I hopped over to Amazon and ordered the Elite Gourmet version.  The instructions were fairly straightforward but there was no recipe so I made up a batch of Classic Waffle batter. Then I scoured the fridge for things to stuff them with.    First up, some leftover taco meat from the previous night and Fiesta blend cheese,  pepperoni and mozzarella cheese and lastly some strawberries and cream cheese.   For the taco stuffed I added the taco meat and cheese in the middle and then set out some salsa and sour cream to top them with.  Learning curve lesson 1- make sure your ingredients are all room temp before you start, they will bake much quicker.  For the pepperoni pi